Pages
26.9.10
Bundle Monster Nail Art | Fall / Autumn 2010 Nail Art
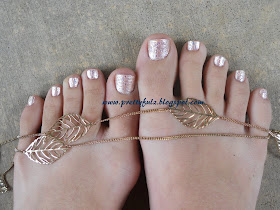
Pretty Pedicure
23.9.10
Doggy Manicure
20.9.10
KONAD Nail Art | Pink Slanted French Tip Nail Art
These are my current nails at the moment. I wish I had more pics to post, but the lighting was not in my favor that day. In my hand is a bracelet I got from Claires, which I absolutely love.
Base "Light Pink" Color: Sally Hansen "Cotton Candy"
Hot Pink Color: Sinful Colors "Cream Pink"
Nail Stamping Color: Pure Ice "Love"
Image Plate Used: BM 20 (Bundle Monster from Amazon.com)
FYI, sometimes when I am writing a post, my blog will do this really annoying double space thing like above. It makes me feel like I am writing a paper for school since that is the only place I ever used double spacing lol
15.9.10
Bundle Monster Nail Art | Purple Nail Art
Heres the nail design I just took off. I am thinking of a new design for my nails now, so I might post again tomorrow. I have the products I used listed below in the order I used them.
12.9.10
LuxAddiction Inspired Cell Phone Case *DIY*
*I used E-6000 glue for this along with a random strong adhesive I found at the house. Any strong clear glue you have should work just fine.
*Pick a cell phone case that has a similar color to your cabochons. I used a hot pink case with light pink cabochons.
*Have a plate with all your gems facing up so they are ready to go as soon as the glue is applied to your cell phone case. The reason is because the glue will dry FAST, like really fast. Sometimes the glue would dry before I got done laying down rhinestones on top of it.
*Take a QTip and cut the cotton part off one end and use this to pick up and place the rhinestones. I would wet the tip of the QTip (the side I cut off) on a damp paper towel to pick up the rhinestones which made placing them on the phone very easy.
*Before you glue anything, lay down your big cabochons on your cell phone case and move them around to get an idea of how you want the final product to look. Take a picture so you can remember the pattern.
*To acheive the 3d effect you will have to layer the cabochons on top of eachother. This was the most difficult part I think of designing the cell phone case. You want to start one cabochon at a time, glue it down, then place rhinestones around it. Take you next cabochon and figure out where you want to layer it, mark the spot with a marker, eye liner brush, or anything you can find to mark the cell phone case with. After that, place rhinestones around (or under which is what I had to do with the crown cabochon since you could see through it) the area. Between placing the rhinestones down, put the big cabochon back on to make sure everything is fitting properly. Once you have the rhinestones down, put some glue on the big cabochon on the spots that will be touching the cell phone case.
This is the design I came up with. It's very cute and pink, and best of all I think it looks just like a LuxAddiction case.
If you are contemplating making your own cell phone case like this, there are a few things you should consider first. If you have a craft store in your area that has the type of decorations you would like to use, I would suggest buying them there. Since I ordered mine from Hong Kong and Japan, it was a little more expensive than I would have liked since I paid for shipping and all that good stuff. Also, when ordering online, you will have to buy some of the pieces in bulk. For example, the flowers and hello kitties came in a pack of 4. So all in all, if you plan on decorating more than just your phone, this is a good deal. I am using my leftover cabochons for my ipod case and will use whatever I have left over for little things. The cost to make just the cell phone case I would say is about $50, but keep in mind you will need to buy more than what you need for just the cell phone case. If you just want the cell phone case and nothing but, I would suggest just buying one from LuxAddiction or Etsy, which will be around $50-$100. I hope this gave you some inspiration for your designs, if you had any questions feel free to comment.
11.9.10
More Nail Designs
Base Color: Sinful Colors "Cream Pink"
Glitter Color: Sinful Colors "Pinky Glitter"
Polka Dot Image: BM 19 with Konad Special White Polish
Crown Images: BM 08 with Konad Pearl Black Polish
Top Coat: Seche Vite
I believe this was the first nail design I made with my Bundle Monster image plates. This was also before I started using Seche Vite top coat, so my other top coat smudged the hearts a little bit.
Base Color: Sinful Colors "Glass Pink"
Pink Tip Color: Flormar "32"
Nail Tip Design: BM 17 with Konad Pearl Black Special Polish
Heart Design: BM 03 with Konad Pearl Black Special Nail Polish
This is a nail design that I obviously did way back during summer. I used the sponging technique to fade yellow, orange, and pink and used a glitter color on top to help blend the colors.
Base (Yellow) Color: Sinful Colors "Let's Meet"
Orange Color: Sinful Colors "Cloud 9"
Pink Color: Flormar "32"
Glitter Color: Sinful Colors "Pinky Glitter"
Bottom Flower Image (2 flowers): M54 with Konad Pearl Black Special Nail Polish
Top Flower Image (1 flower): M57 with Konad Pearl Black Special Nail Polish
I did this nail design in the begining of my nail stamping days. Needless to say, I will have a much more interesting design next 4th of July. But I figured I would post it since it's simple and still might give someone an idea for their nails.
Red Color: Sinful Colors "Under 18"
Blue Color: Pure Ice "All Night Long"
Star Nail Design: M76 with Konad White Special Nail Polish
I have a few more random designs that I will be posting this week. I generally do my nails twice a week, sometimes once a week if I am busy or too lazy to pull all my nail gear out lol. I am going to try to post weekly for now on so keep checking back. AANNNNNDDDD .. i am debating to get a video camera so I can post nail tutorials on YouTube, if and when I do I will be sure to post lots of links. =)